Trial Lesson: What Roblox Studio Has to Offer
Exploring Roblox Studio
Before We Get Started
- Follow the guide on Preparation for Students for information on how to sign up and how to install Roblox Studio.
Programming Topics
For the trial lessons, we will mostly be following what is regularly taught in Lesson 1 with a few additional activities depending on the age group and their interests:
- 1 Exploring Roblox Studio's Interface and Basic Tools
- 2 Younger Students
- 3 Older Students
T1: Exploring Roblox Studio's Interface and Basic Tools
This section is pulled from L1-1 Intro to Basic Controls. It's important we introduce the students to the interface of Roblox Studio and where to find the basic tools needed for creating and transforming an object.
- Spawning Parts
- Manipulating Parts
- Changing the Appearance of Parts
Spawning Parts
If you have ever played a Roblox game or any other game in general, what we visually see are the models, be it 2-dimensional (2D) or 3-dimensional (3D). These models are made of basic shapes such as circle, squares, and triangles.

You can find the button to create a Part in either the Home or Model tab.
In Roblox, the models consist of 3D shapes called Parts in Roblox Studio.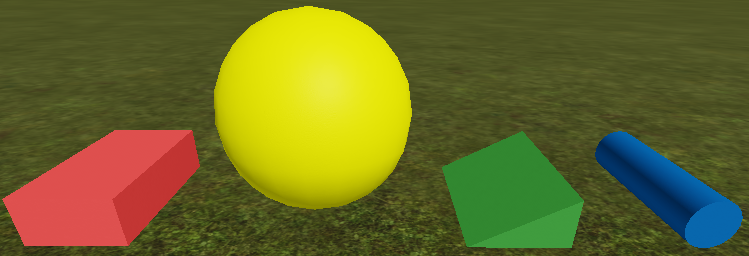
- Block (Red)
- Sphere (Yellow)
- Wedge (Green)
- Cylinder (Blue)
Manipulating Parts
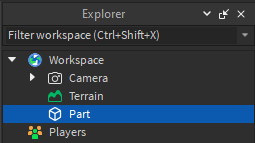
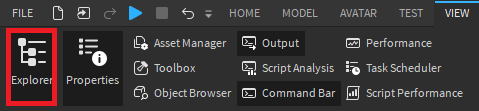
Once a Part is spawned onto the game, it will exist in the game's Workspace. You can find the Workspace in the Explorer window. If you can not see the Explorer window, you can toggle it on by going to the View tab.
Now, let us manipulate the Part. There are 5 types of tools we can use to change its Position, Size, and Orientation properties. You can find these tools in the Home or Model tab.

 Select
This tool allows you to drag your selected object around and is great for getting models to snap onto a surface. This tool is mainly useful for moving objects on a somewhat flat surface or for drag-selecting multiple objects in the game viewer.

 Move
Move
This tool allows you to move the object in any of the X, Y, Z positions, and is great for lifting objects into the air or below the surface that Select cannot do.
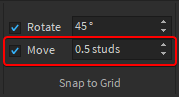
You can also set the amount studs for precision or uncheck for free movement found under the Model tab as seen below.

 Scale
Scale
This tool allows you to change the size of a Part in the X, Y, Z directionals. If multiple Parts are selected, this will shrink or enlarge every piece to keep their ratio the same.

 Rotate
This tool allows you to change the Orientation along the X, Y, Z direction.
You can also set the rotation angle or uncheck for free rotation found under the Model tab.


 Transform
This tool is an all-in-one tool, bundling Move, Scale, and Rotate. The Transform tool locks itself to a surface plane.

To change the plane, there is a grid-looking button on the top-left. Once selected, hover your mouse over another surface until it is highlighted and click to set it as the new plane.
As you try out each tool, take a look at how each of the 3 properties change from the Properties window. If you do not see the Properties window, head to the View tab to toggle it on.

Note that you can also change the properties directly from the Properties window instead of using the Manipulation tools.
Changing the Appearance of Parts
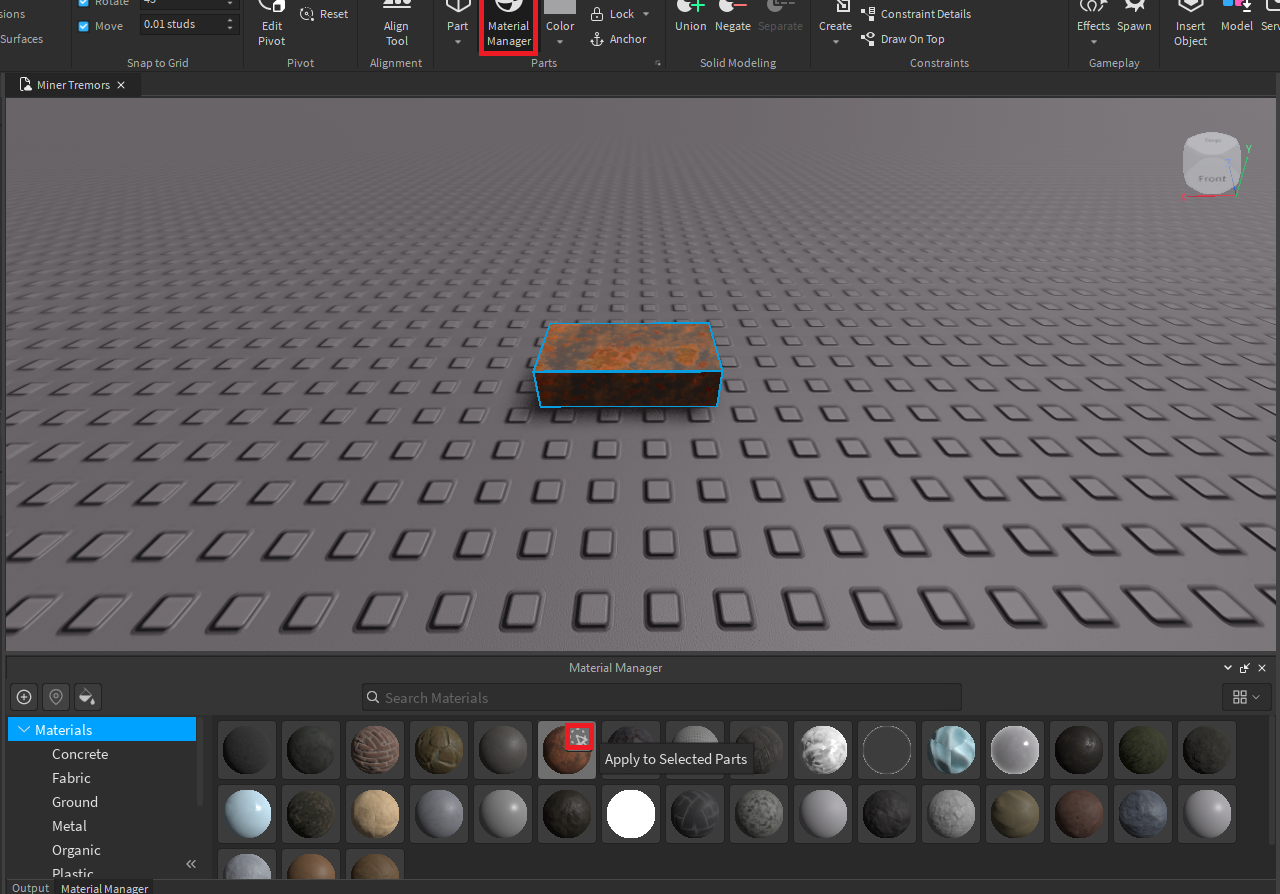
Every Part that you create will always default to "Medium stone grey" color with a "Plastic" material which is pretty boring to look at. There are 2 ways to alter the appearance of a Part's skin which is through the Material and Color properties. You can find both of these options in either the Home or Model tab.

Material
This option changes the visible texture of a Part. Note that changing the Material also changes its weight. For example, we created a vehicle with its body made out of Plastic. With Roblox's physics, gravity will not weigh down as much on the vehicle, making it fast and light. However, if you change the material to metal, the outcome would be the opposite, slow and hard to turn.
Color
This option changes the color of a Part. When you click on the dropdown for Color, you will see a predefined list of colors you can select for your Part. If you want a specific color, you will need to view its Properties. Inside the Properties window, you will notice 2 properties called BrickColor and Color.
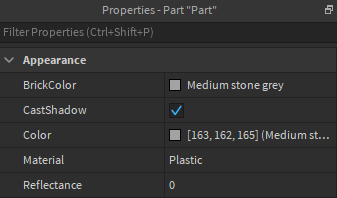
- BrickColor uses the predefined colors from the dropdown menu.
- Color uses RGB components to set it to a specific color you want. It will also estimate the closest predefined color from Roblox and display the name on the side.
T2: Younger Students
This section is pulled from T3-1 and Project 8 Exercise 1. For the younger students, jumping straight into just scripting would overwhelm or bore them, therefore we will focus more on designing and showing them a basic script that will kill their character if they touched a dangerous block.
- Terrain Editor
- Basic Scripting
Tired of having a flat ground? Want to see more than just a Baseplate or plain grass? Need some bumps along the road? You're in luck because Roblox Studio's terrain tools allow you to create realistic landscapes like mountains, rivers, and canyons.
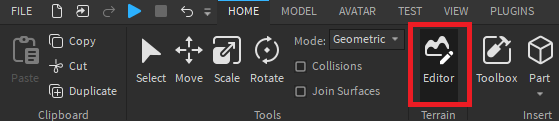
Terrain Editor
From the Home tab, click on the Editor button to open the terrain editor.
Create Tab
Generate
The Generate tool is used to create random landscapes. You can use this to quickly start a new landscape and then modify it based on your individual vision.
Region Tab
Tools in the Region tab speed up terrain creation by letting you work with large areas.
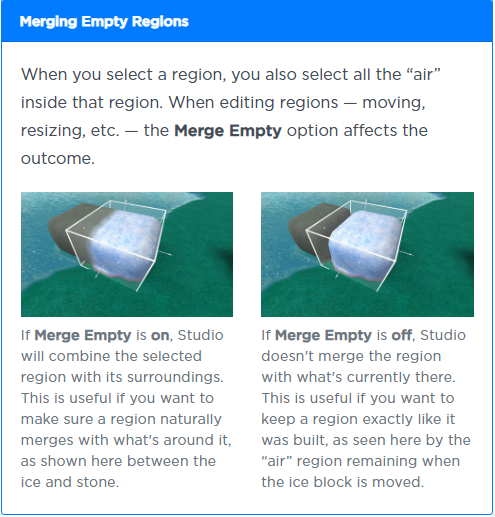
Filling and Deleting
You can even fill or delete entire regions with a material:


Edit Tab
Add/Subtract
The Add and Subtract tools are useful for building the majority of your environment, before you start fine-tuning details. These tools contain various attributes:

Grow
The Grow tool slowly fills in areas with terrain which is useful for adding hills or smoothing out gaps. This tool includes the following additional options:

Erode
The Erode tool slowly removes terrain. This is useful for creating caves, canyons, rivers, and lakes.

Smooth
The Smooth tool smooths out terrain in the selected area. This is useful for making jagged terrain more natural and getting rid of sharp corners.
Flatten
The Flatten tool lets you create completely flat terrain, ideal for areas where you may want to place buildings or roads. In addition to the various attributes outlined above, this tool includes:

Paint
The Paint tool changes the terrain's current material, for example grass, rock, or water. This is useful for adding variations like dirt and rock patches in a grass field.

Basic Scripting
After we get the students' interest from designing their own world, show them a very short kill script. You do not have to explain to them all the programming nuances, just tell them they can create exciting gameplay with scripting.
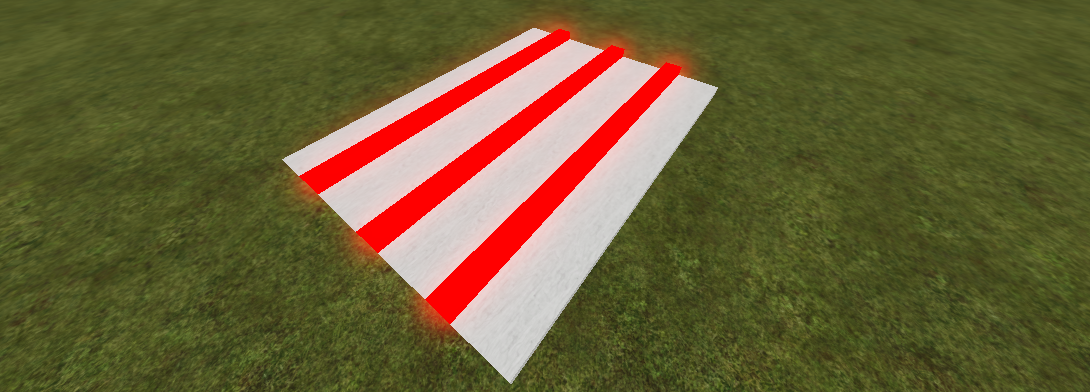
Here is how to make a Kill Block:
- First, spawn a Block part and name it KillBlock.
- Add a script inside KillBlock and type the following code:

- The part should now kill any player that touches it. You can transform the KillBlock to look like so:
T3: Older Students
This section is pulled from Project 8. For older students, we will demonstrate different scripted models to peak their interests in coding and also explain what coding terms to expect. If they, however, would prefer to use creativity then go through T2 instead.
- Modeling and Scripting a Gate
- Modeling and Scripting Platforms that Fade
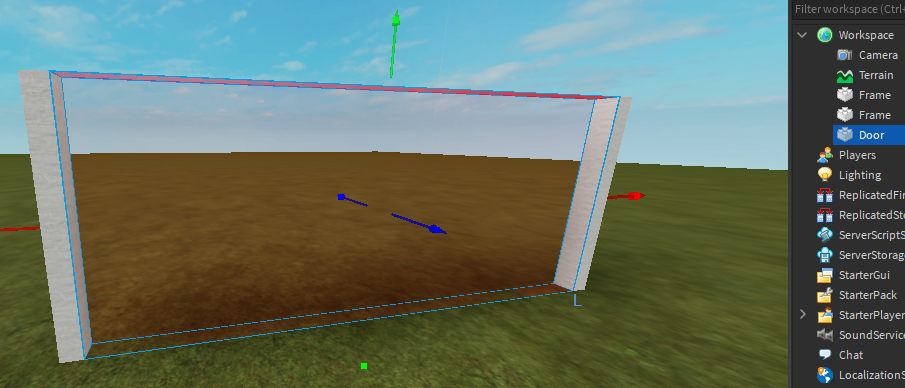
Gate That Opens Through Stepping Plates
- Let's first make a basic door.
- Rename the part that you want disappearing and reappearing as Door while the rest are the Frames.
- Next, create 2 square plates, each with a different color so you can tell the two apart. Name one OpenButton and the other CloseButton.

- Anchor all the parts and group them together.
- Rename the newly grouped Model as TouchDoor.

- Add a script inside TouchDoor and open to edit it.
- Inside, we will type the following code:

- Test if it works by running your character on top of the plates.
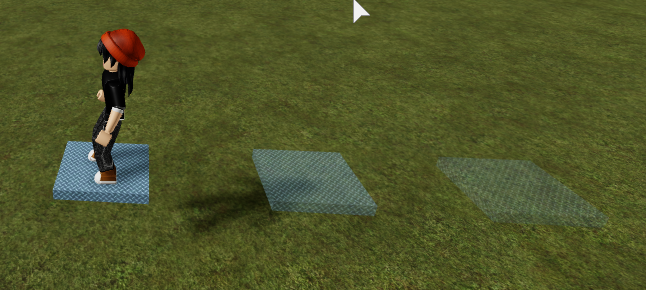
Platform Fades When Touched
- We will be making platforms that fade for a bit then reappears after a player touches it. This is great when used for an obby and we want the players to continually move instead of taking their time.
- Create a simple, small platform and make sure it is Anchored.
- For this exercise, we will rename the part to FadePart.

- Create and place a script inside FadePart. We'll call this script FadeScript.

- Duplicate the FadePart and make your own disappearing level.